Whether you’re a freelancer or a full time employee working on a team, there are times when you need to show your progress to other team members, sure there are staging environments with designated links you can use, but the fact is rebuilding your code and deploying to staging environments takes time, and it’s exponentially time consuming when you have to make tiny changes every time. Don’t you wish there’s a way to quickly make a change and have the QA person instantly see what’s on your local host? With ngrok, we can securely expose our localhost to the web via tunneling.
In this tutorial, I will show you how easy it is to get your localhost to the web for anyone to see
Install ngrok
you can download the ngrok client for your operating system at https://ngrok.com/download , this will download the ngrok program and install command line took to your system.
Get an auth token
Sign up for an account at https://dashboard.ngrok.com/signup to get an auth token, the basic plan is free, and you get the following features:
- HTTP/TCP tunnels on random URLs/ports
- 1 online ngrok process
- 4 tunnels/ngrok process
- 40 connections / minute
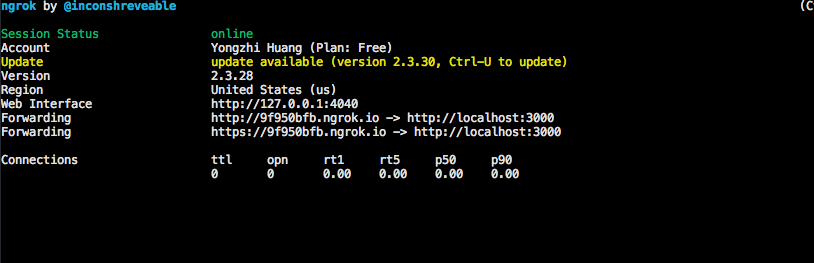
Once you get your auth token, open your terminal and run this command in order to set up your credentials:
./ngrok authtoken <YOUR_AUTH_TOKEN>Get tunneling
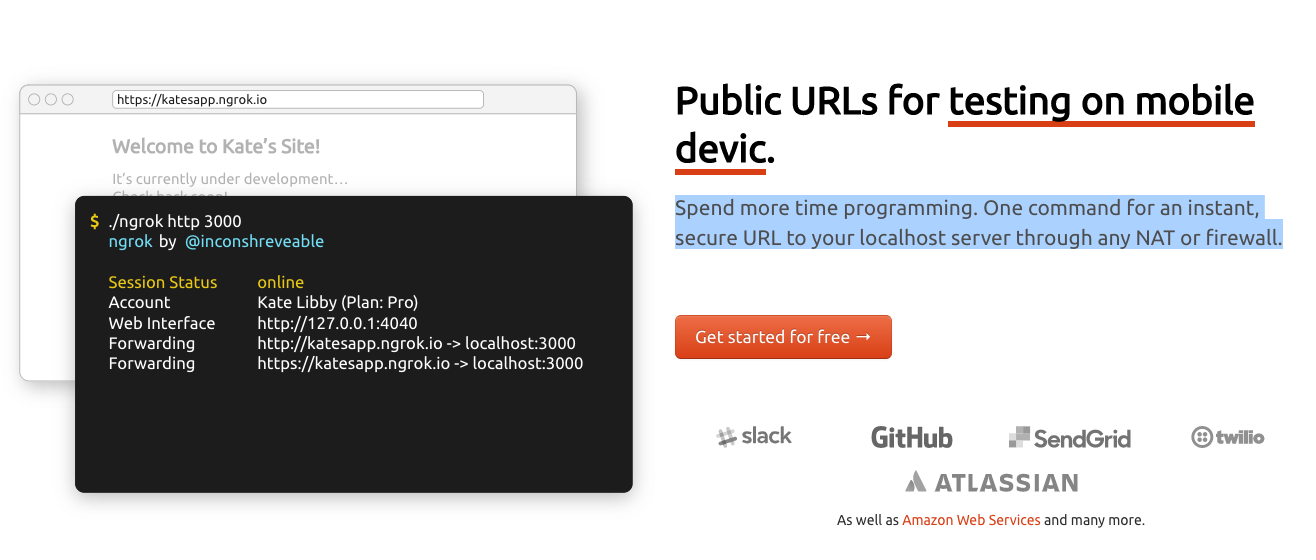
Now you’re ready to tunnel, let’s say we have an app running on port 3000, we can tell ngrok to expose our port 3000 to the world by running the following command:
./ngrok http 3000ngrok will generate a link for you that is unique to your system, that is the link you can share with another person if they want to see what’s running on your local server on port 3000:
and that’s it! Isn’t it amazing? Now you can make your changes and have them refresh their browser and they’ll instantly see what you changed. Keep in mind that this port is now open, so it might be a good idea to close your ngrok tunnel when you’re done with your work, you can close your ngrok tunnel by pressing control+c
That is the basics of ngrox, there are a bunch of amazing things ngrok can help you with as far as tunneling goes, you can read their documentation here to grasp what its capable of.
If you enjoyed this tutorial, make sure to subscribe to our Youtube Channel and follow us on Twitter @pentacodevids for latest updates!