So you dressed up your terminal with your favorite bash profile, tuned up your monitor lighting to an ambient level and your favorite chillstep music is playing in the background, in other words, you’re ready for Redis and Chill. Welcome to our tutorial series on how to master the art of Redis!
What is Redis?
Redis is an open source (BSD licensed), in-memory data structure store, used as database, cache and message broker. It supports data structures such as strings, hashes, lists, sets, sorted sets with range queries, bitmaps, hyperloglogs and geospatial indexes with radius queries. Redis has built-in replication, Lua scripting, LRU eviction, transactions and different levels of on-disk persistence, and provides high availability via Redis Sentinel and automatic partitioning with Redis Cluster.
Created by Salvatore Sanfilippo aka antirez, Redis is one of the most popular piece of software on the web! I’m very excited to give you a tutorial today and I hope to demonstrate you the power behind this amazing database.
Installation
You don’t need to have Redis installed in order to start try out commands, but we’re all about being practical, so I’m going to show you how to install Redis in three different ways:
- Standard installation
- Digital Ocean pre-build droplet
- Docker Container
Standard Installation
Assuming you’re on a *nix based OS (sorry Windows users):
Head over to http://redis.io/download, download the current stable version (3.2.3 at the time of writing):
wget http://download.redis.io/releases/redis-3.2.3.tar.gz
tar xzf redis-3.2.3.tar.gz
cd redis-3.2.3
make
sudo make install
verify redis is working by turning on Redis Server in the background
redis-serverthen open another terminal tab and start a Redis Client by:
redis-cli
When you see the terminal prompt changed into
127.0.0.1:6379>type in INFO
and you should see something like this:

That’s it! Fast and simple. Now you don’t want to run Redis server in a new tab everytime you need to develop your app, so we should make Redis Server to run automatically in the background.
Follow this tutorial if you’re running on Mac.
Digital Ocean Pre-built Droplet
The fastest, easiest way for us to set up a fresh server with Redis pre-installed, is via a Digital Ocean droplet. Digital Ocean is an amazing cloud hosting company similar to AWS, Google App Engine or Microsoft Azure where you can start your own private servers. If you would like an intro tutorial on Digital Ocean, I recommend you to read my tutorial on How to create a blog in 5 minutes with Digital Ocean
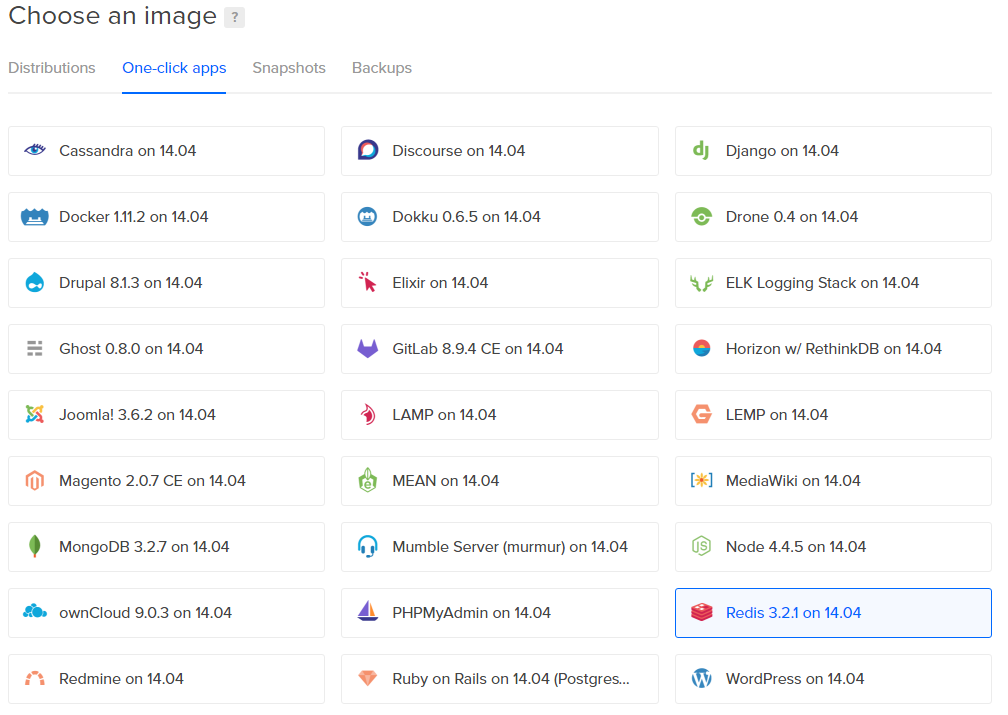
Ok, head over to Digital Ocean, assuming you’re signed in, we’ll need to create a droplet (a droplet is Digital Ocean’s term for a server), select Redis 3.2.1 on 14.04 under One Click Apps:
Select your droplet size and location and name it something you can easily reference it by, then click Create to launch your server. Within 60 seconds, you will receive an email with password to your server! That’s it, that server now has Redis pre-installed.
To test it out, SSH into the server
ssh root@YOUR_SERVER_IPenter the password that was sent to you to your email and you should be able to log in:
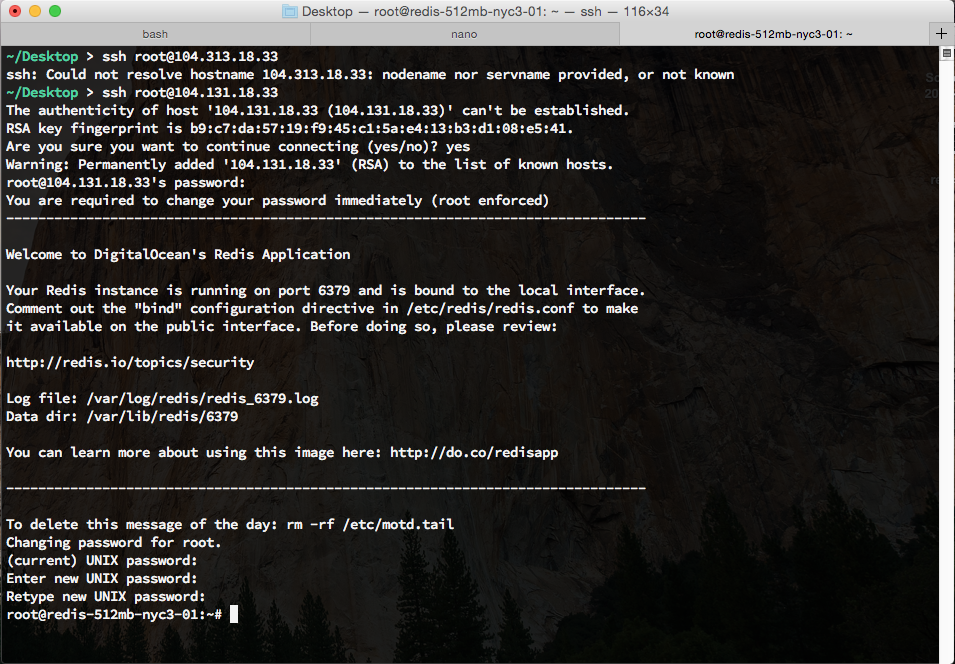
follow the instruction above from the Standard Installation section and you should see a similar screen that displays your Redis server information.
Your remote Redis server is now set up! If you wish to connect to it, you would do this on your local server:
~/Desktop > redis-cli -h 104.131.18.33
Could not connect to Redis at 104.131.18.33:6379: Connection refused
Could not connect to Redis at 104.131.18.33:6379: Connection refused
Hmm, why is this not working? That is because by default, Digital Ocean turned off connections to the server from outside. This is a good security practice because only IPs from a whitelist can connect to the server.
For the sake of this example, let’s let anyone from anywhere connect to the server.
On your droplet, type:
vi /etc/redis/redis.confThis will open up your Redis Config file using Vim, we need to look for the line:
bind 127.0.0.1and comment it out
#bind 127.0.0.1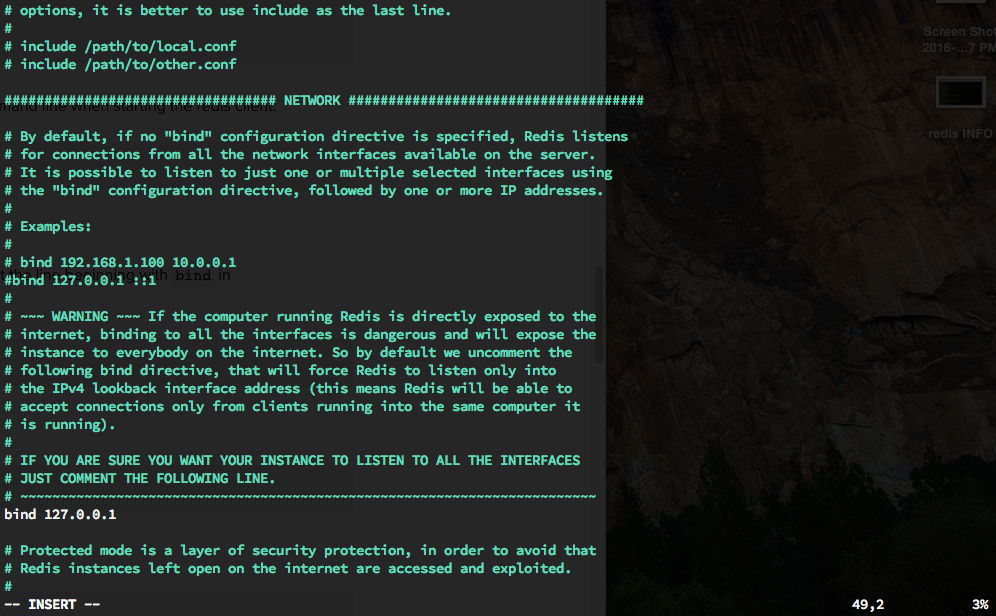
You also need to turn off Protective Mode by changing this line from:
protected-mode yesto
protected-mode noSave (:wq) and restart the Redis Server by:
sudo service redis restartNow on your local computer, connect to the Redis droplet by
redis-cli -h 104.131.18.33where 104.131.18.33 is your server IP, and you should be able to connect and run the INFO command!
Of course the above was just to demonstrate how you would connect from a remote location, in practice, you should always limit connection with an IP whitelist and set a password to your Redis server. Digital Ocean’s droplet comes with a lot of best practices built in, so it’s definitely my preferred method of installation.
Docker
Docker is the one of the hottest Containerization technology around the block. With Docker, you can isolate Redis on a “container” on your computer to reach true isolation while maximizing your server utilization, This part of the tutorial is useful if you are thinking about adding Redis to your existing stack. If you need an intro to Docker, you can read about my tutorial here: Using Docker to deploy Apache, Nginx, WordPress and Nodejs containers with Digital Ocean and Creating a LEMP stack with Docker Compose
To start, we need to create a directory on either your local machine or your server:
mkdir docker-redis
touch docker-compose.yml
open up your favorite editor and edit the docker-compose.yml file, in my case I use Visual Studio Code:
redis:
    image: sameersbn/redis:latest
    ports:
        - 9000:6379
redisBanner:
    image: tenstartups/redis-commander
    command: --redis-host redis
    links:
      - redis:redis
    ports:
      - 9001:8081
We’re going to install Redis and a very helpful companion app call Redis Commander.
Start a docker terminal session and type:
docker-compose up -dand you should see your containers being created:
Creating redisdockercompose_redis_1
Creating redisdockercompose_redisBanner_1
~/Desktop/Development/pentacode/redisDockerCompose (master) > docker ps
CONTAINER ID        IMAGE                         COMMAND                  CREATED             STATUS              PORTS                    NAMES
4f1d71ab07d9        tenstartups/redis-commander   "redis-commander --re"   2 seconds ago       Up 1 seconds        0.0.0.0:9001->8081/tcp   redisdockercompose_redisBanner_1
9f83842d2ec9        sameersbn/redis:latest        "/sbin/entrypoint.sh"    2 seconds ago       Up 1 seconds        0.0.0.0:9000->6379/tcp   redisdockercompose_redis_1
believe it or not, we’re done! Now we should be able to connect to the containerized Redis server from inside Docker. Let’s find the IP address of the container instance:
docker-machine ipthis will return the IP of our docker virtual machine. In my case it returned 192.168.99.101 , we also know the port of our Redis server because we defined it in our docker-compose file, the port to the redis server is 9000. Now that we have the information we need to connect to our Redis instance, let’s start a connection.
With our local Redis client installed, we can connect to our container via the following command:
redis-cli -h 192.168.99.101 -p 9000
Amazing isn’t it? Let’s set a key in Redis so we can demonstrate the power of Redis Commander:
SET name "Pentacode"
SET url "www.penta-code.com"
Redis Commander was set up on port 9001, so we need to head over to http://192.168.99.101:9001/ in order to access the web UI:
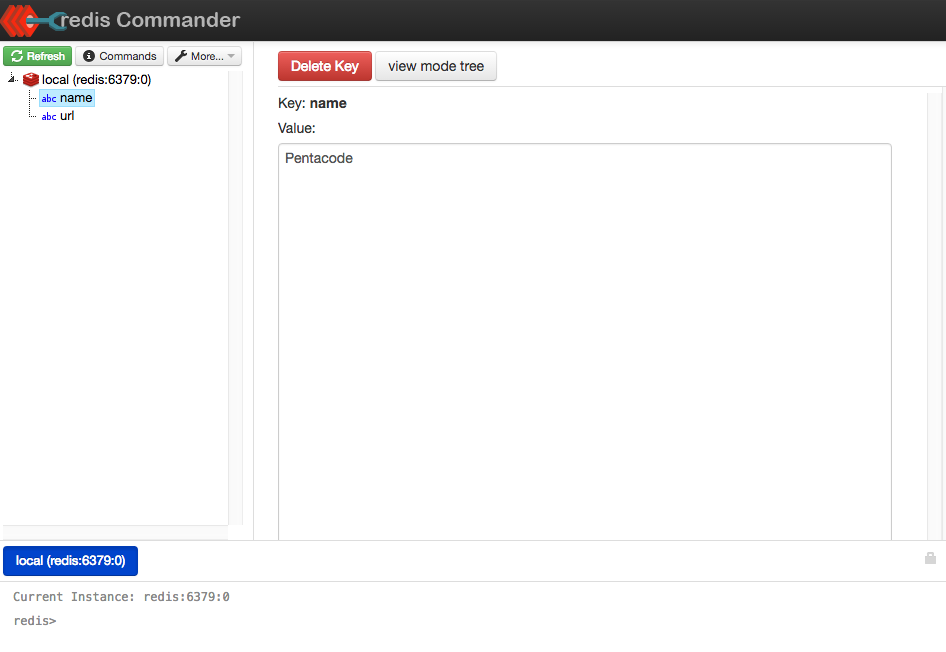 The UI is really straight forward, now you can VISUALLY see all your keys and perform operations on them!
Head over to Redis Commander website for more info on what it’s capable of.
Of course the above Docker workflow can be performed within your Digital Ocean droplet as well (Digital Ocean also provide droplets pre-built with Docker).
That is it for our intro lesson! We went over three ways to set up Redis today, and we set up Redis Commander to help us see our data inside Redis better. Next time we’ll talk about how we can use what we setup today to power our applications. I’ll see you there!
If you enjoyed this tutorial, make sure to subscribe to our Youtube Channel and follow us on Twitter @pentacodevids for latest updates!